Moving out of a property requires a thorough end of tenancy cleaning, which is one of the 5 ways to prepare for your new home. Failing to carry out this cleaning can result in a deduction from your security deposit, as required in your lease agreement.
The cleaning process can be time-consuming and challenging, especially with many pieces of furniture and belongings to move. Planning ahead and allowing sufficient time is essential.
You may also need to enlist the help of friends or family members or hire a professional cleaning company to assist you with that or at least provide some move-out cleaning tips.
How often do air vents and filters need to be cleaned?
The frequency of cleaning air vents and filters depends on various factors such as the type of HVAC system, usage frequency, environment, and indoor air quality. It is generally recommended to clean them at least every three months, but if you live in a polluted area or have pets/allergies, you may need to do it more often.
Neglecting this maintenance can cause dust and debris buildup, reduce airflow, increase energy usage, and pose health risks, such as attracting various pests. To maintain indoor air quality and system efficiency, follow the manufacturer’s cleaning guidelines.
Cleaning air vents and filters may seem intimidating, but it’s crucial for a clean and healthy environment. After all, your house is a playground for your kids, and you want to keep them safe.
With the right tools and techniques, it can be easily accomplished. Cleaning air vents and filters is a task you should pay attention to, as it’s essential to maintaining the property and ensuring a clean and healthy, allergy-free environment.
Tools you’ll need
When cleaning air vents and filters, gather essential tools like a vacuum cleaner, screwdriver, a soft-bristled brush, cleaning solution and microfiber cloth. It’s also necessary to prioritise your safety and wear protective gear such as gloves and a face mask to avoid inhaling dust and debris during cleaning.
Some HVAC systems require specialised tools for proper maintenance, so get familiar with the manufacturer’s cleaning guidelines and follow them to maintain work efficiency up to their standard.
If you’re unsure or uncomfortable with the work, consider getting a technician or a cleaning company. They have the necessary tools and expertise to do it correctly. Don’t hesitate to seek professional assistance when needed! Not only does this save you time and effort, but it also assures you that the job is done correctly.
Step-by-step guide for air vent cleaning
- Turn off the HVAC system. Before cleaning the air vents, turn off the HVAC system to prevent dust and debris from circulating in the air.
- Remove the vent covers. Using a screwdriver, remove the vent covers to access the air ducts and filters.
- Clean the vent covers. Use a soft-bristled brush to gently scrub the vent covers and remove any dirt or grime buildup. Then, wipe the vent covers down with a microfiber cloth to remove any remaining dust or debris.
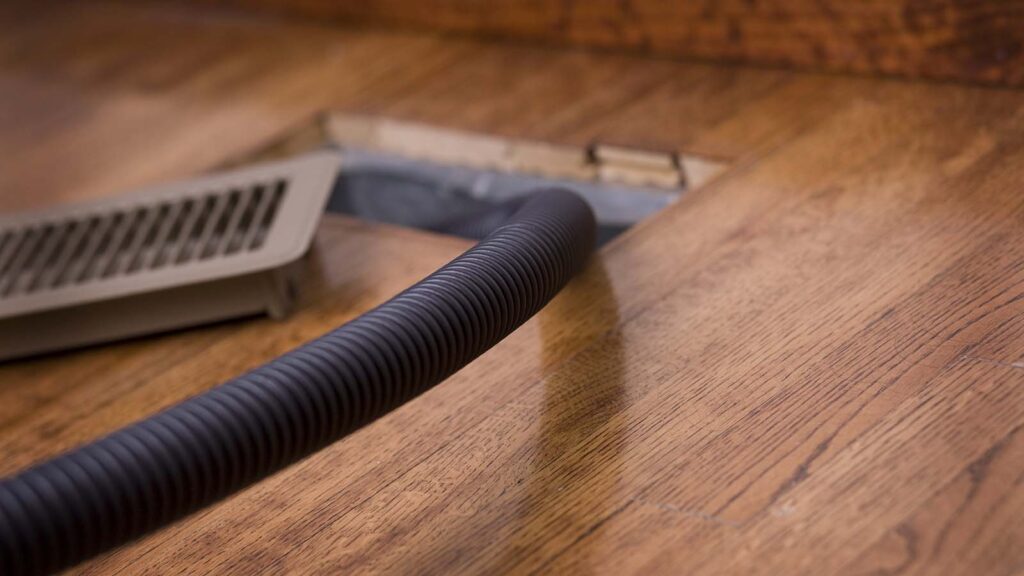
- Clean the air ducts. Using a vacuum cleaner with a hose attachment, clean the air ducts thoroughly to remove dust or debris. Be sure to get as far into the ducts as possible to ensure a thorough cleaning.
- Reinstall the vent covers. Once the vent covers, air ducts, and filters are cleaned and dry, reinstall the vent covers and turn the HVAC system back on.
- Schedule regular cleaning. To maintain good indoor air quality and ensure efficient operation of your HVAC system, it’s recommended to clean air vents and filters every three months or as the manufacturer recommends.
To prevent dust and dirt from spreading while you clean other areas, it’s essential to cover the vents that aren’t being cleaned. You can lift the supply vents and place a paper towel between the vent cover and the wall or floor. The paper towel will help keep the dust and debris from blowing in and out of the vent while cleaning.
Step-by-step guide for filter cleaning
- Turn off the HVAC system. Before cleaning the filters, it’s crucial to turn off the HVAC system to prevent dust and debris from circulating in the air.
- Locate and remove the filters. Locate the air filters in the air return duct or in a slot on the furnace or air handler. Remove the filters by releasing any latches or unscrewing any panels required.
- Clean the filters. Remove any loose dirt and debris from the filters using a vacuum cleaner with a soft brush attachment. If the filters are particularly dirty, wash them with soap and water, and let them dry completely before reinstalling them.
- Clean the air return ducts. Use a vacuum cleaner with a hose attachment to thoroughly clean the air return ducts. Ensure you reach the ducts as far as possible to remove dust or debris.
- Reinstall the filters. Once the filters are clean and dry, reinstall them in the air return duct or slot securely.
- Turn on the HVAC system. After reinstallation, turn on the HVAC system and check that it’s functioning correctly.
- Schedule regular cleaning. To ensure the efficient operation of your HVAC system and maintain good indoor air quality, it’s recommended to clean the air filters every three months or as the manufacturer recommends.
By following these simple steps, you can improve your indoor air quality, increase the efficiency of your HVAC system, and save money on your energy bills.
Hire a professional cleaning company
When it comes to end of tenancy cleaning or regular maintenance, you may consider cleaning the air vents and filters yourself. However, hiring a professional cleaning company can offer several benefits.
Professional move out cleaners have the necessary equipment and tools to clean air vents and filters effectively. They use specialised equipment such as high-powered vacuums to remove dust and debris from the ductwork, ensuring your air conditioning system runs efficiently.
In addition, they have the experience and expertise to identify and deal with any issues that may arise during the cleaning process, such as damaged filters or blocked ducts.
Hiring a professional cleaning company also ensures a thorough cleaning service, leaving your property in top condition for the next tenant and saving you time and effort.
They clean not just the air vents and filters but also the ductwork and other components, ensuring that every part of the air conditioning system is clean and functioning correctly.
Conclusion
Cleaning the air vents and filters is essential for a thorough end of tenancy cleaning, but a healthy habitat at home and lifestyle overall.
You can follow the tips provided in this article to clean them effectively. Still, it’s always a good idea to conduct a final inspection to ensure everything is in good condition.
Clean vents improve indoor air quality, and if you lack the time or skill, hiring a professional company can save time and effort. A checklist from a professional cleaner can give you peace of mind.
Overall, whether you do it yourself or hire a professional, cleaning the air vents and filters should not be overlooked.

